With the Yaleo Console, you can easily create and launch Native Ad campaigns yourself — from setting up your account and defining campaign details to creating ad materials, setting your budget and runtime, and optimising performance.
With the Yaleo Console, you can easily create and launch Native Ad campaigns yourself with the help of AI. Here, we explain step by step how it works.
Step 1: Create a Yaleo account
Register on yaleo.com with your email address. We will send you an email to confirm your account. Then you’re ready to get started!


Step 2: Create a campaign
Log in and click the “Create campaign” button in the top right corner.
First, choose a name for your planned advertising campaign. Then, in the “Advertiser” field, enter the company for which you would like to book the campaign. You also select the industry the company belongs to. Then click “Save & continue” in the top right corner.
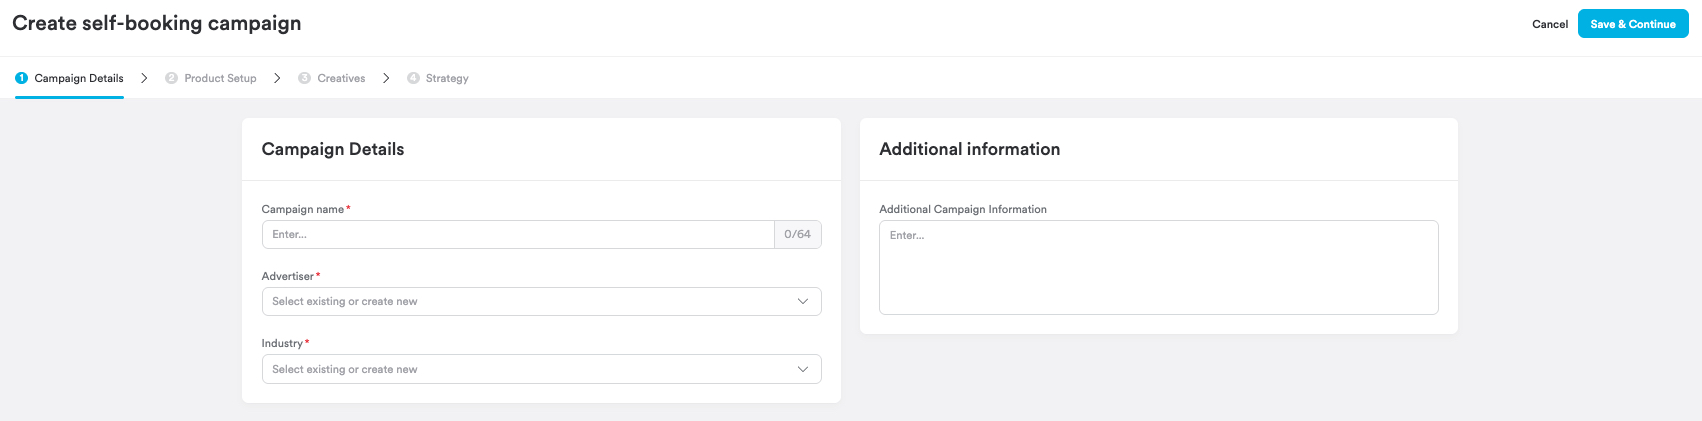
Step 3: Define the key details of the campaign
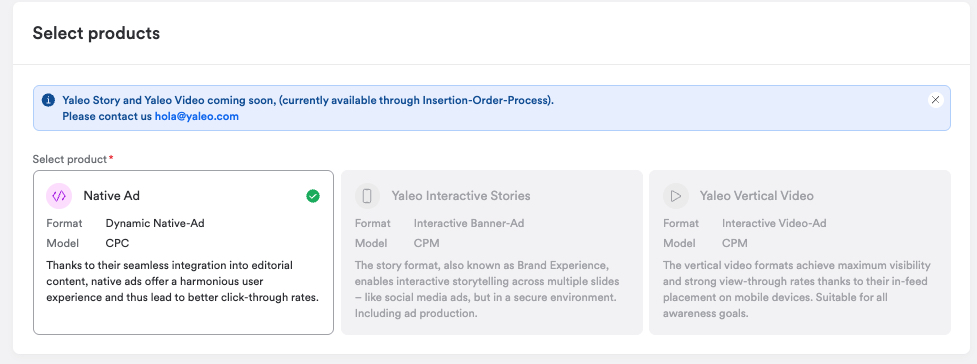
First, choose the ad format for your campaign. Currently, only the Native Ad format is available. A Native Ad is an advertisement consisting of text and an image that looks like the teaser for an editorial article on the respective website. A Yaleo Native Ad has the advantage of automatically adapting to the design of the website on which it is displayed. As an advertiser, this means you don’t have to spend additional time designing different ads for different websites. They also appear less disruptive and are perceived more positively.
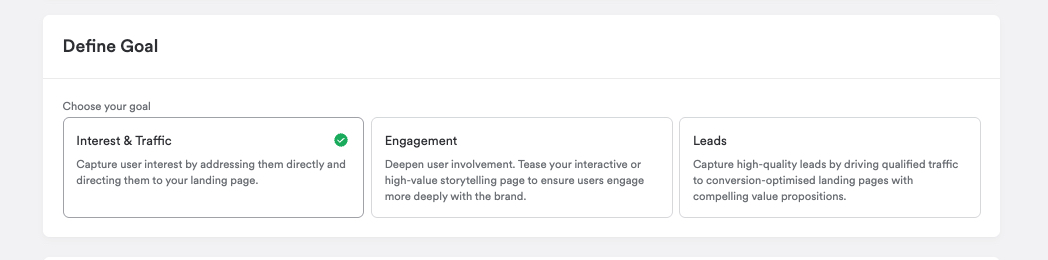
In the next step, you define the goal of your campaign. Do you primarily want to generate interest and bring your target audience to your landing page? Or do you want to increase engagement with your product or generate valuable leads? The choice is yours.
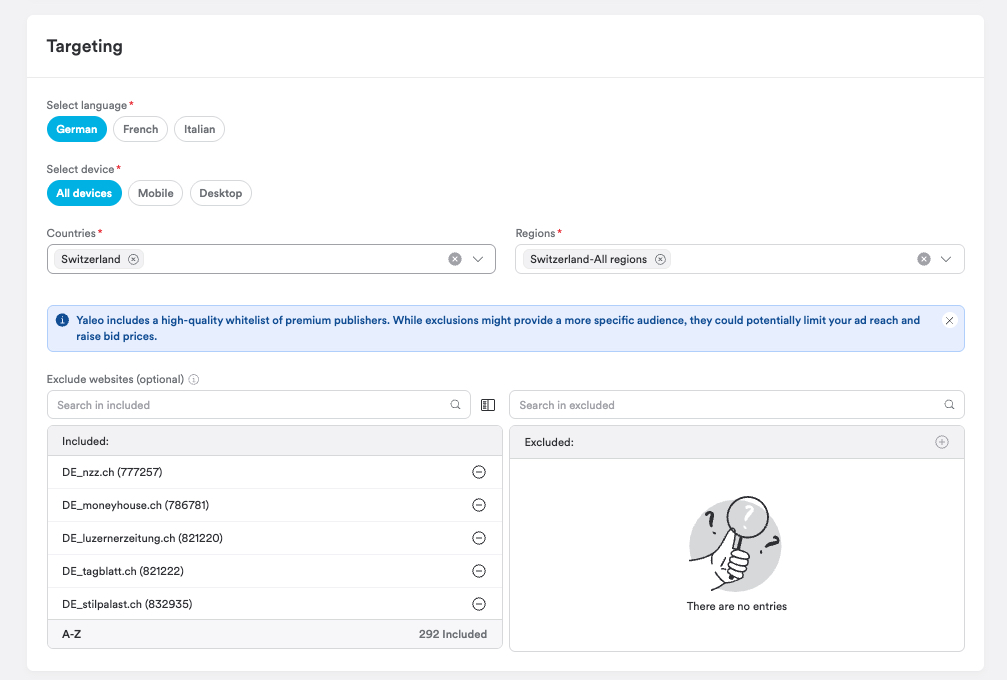
Finally, define who you want to reach with your campaign. Decide in which language, on which devices, and in which regions you want your campaign to be displayed. You can also define more precisely on which publisher sites your campaign should run. By default, Yaleo campaigns are delivered in-feed across a network of more than 200 Swiss premium websites, reaching a broad target audience in all parts of the country. If you do not want to be present on certain websites or would like to define your target audience more specifically, you can exclude up to 10 websites.
Then click “Save & continue” in the top right corner.
Step 4: Create ad materials
Now it’s time to create the ad materials. You can create them manually or with the help of AI. It is important that you create at least three different versions so that we can analyse their performance and optimise your campaign.
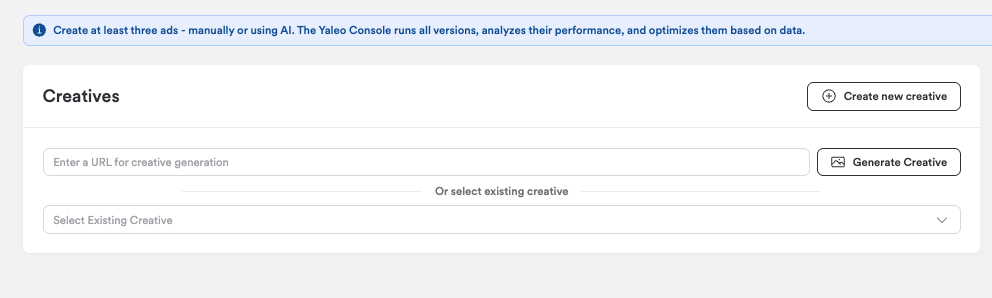
Create ad materials manually
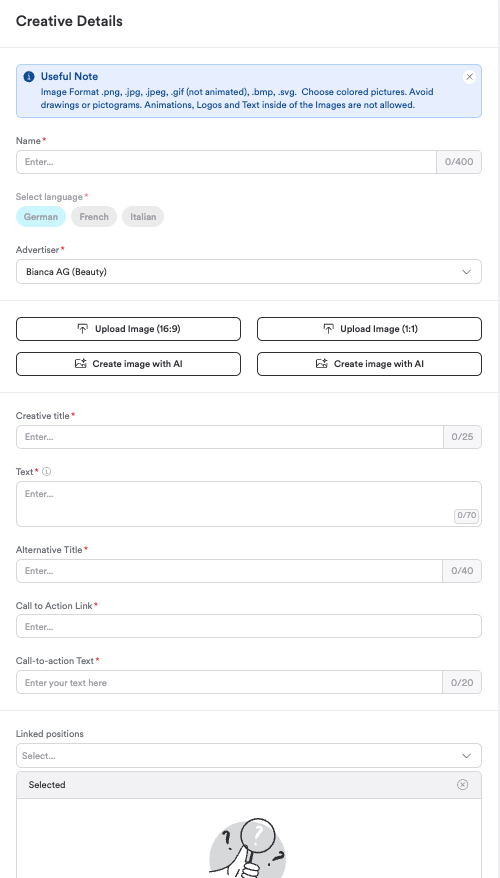
Click “Create new ad material” to create a creative manually. First, give the creative a name and then select the language in which your ad is written. Next, upload the image you would like to use for your Native Ad, or alternatively have AI create an image for you. Then choose a short title and intro text that appeal to your target audience and ideally encourage them to click on your ad. In the “Alternative title” field, you can choose a slightly longer title for a variation of your ad. You also add the link to which you want to direct your target audience when they click on your ad. Finally, don’t forget a call to action encouraging potential customers, for example, to book an appointment, learn more, or discover your product. A preview of your ad material is displayed on the right-hand side. Then click “Create ad material” in the top right corner to complete the process.
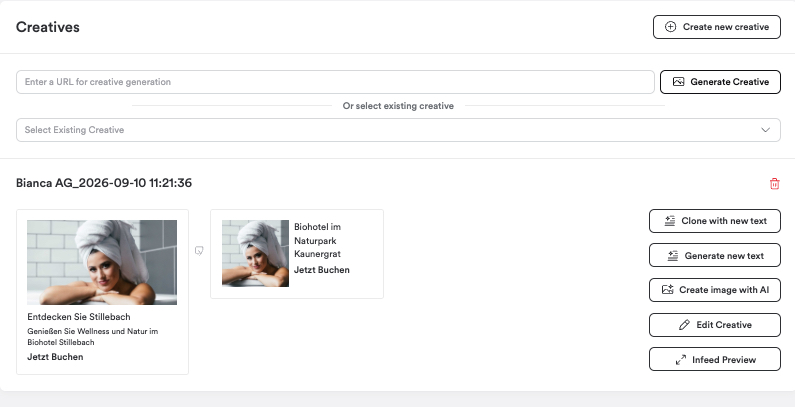
Create ad materials using AI
It’s even easier if you create your ad materials using AI. Simply enter the URL of your website/landing page and click “Generate ad material”. AI will create a ready-to-use Native Ad for you, including image, title, intro text, and call to action. If you are not yet 100% satisfied with it, you can, for example, generate new text or edit the ad material yourself. You can also easily have an AI-generated image created and use it for your ad. Once the ad matches your expectations, click “Save & continue” in the top right corner.
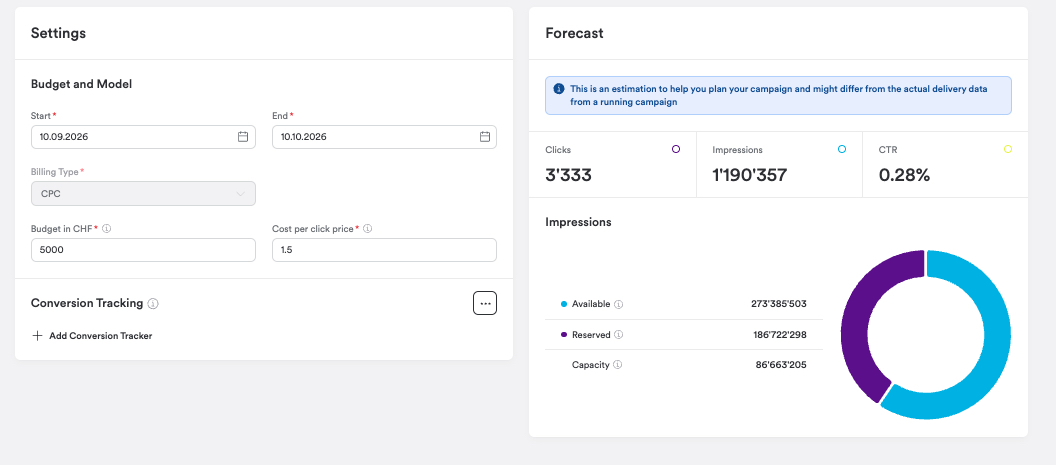
Step 5: Define budget and runtime
In the next step, you define the start and end date of your campaign and specify how much budget you have planned for it. You can set the price you are willing to pay per click yourself. This ensures that your costs remain easy to calculate at all times. For successful delivery of your campaign, we recommend a competitive click price between CHF 1.25 and CHF 2.50 per click. As a general rule: the higher you set the click price, the greater the chances that your ad will be displayed. This is because your ad competes with other ads in a real-time auction. A higher click price increases the chance that your ad will win. On the right-hand side, you will see a forecast that automatically adjusts as soon as you change the click price. Finally, you only need to integrate conversion tracking. You can add this in the “Setting” section. Click “Save & continue” in the top right corner and your campaign is ready.
Step 6: Track and optimise your campaign
After the campaign starts, you can keep an eye on performance at all times. Through your access to the Audienzz Adconsole, you can see how your campaign is running and how the most important key figures are developing. This allows you to identify early on whether your campaign is performing as desired and make adjustments if needed. With continuous monitoring, you have the opportunity to optimise your campaign in a targeted way and get the most out of your budget.
Would you like to try it yourself right away? Then test the Yaleo Console now and launch your first campaign. Let’s go!